What follows are answers to some
of the most basic, common questions that folks have as they begin thinking through
the construction of their solar projects. We've tried to keep these answers as concise as
possible. If your questions aren't covered here, if you want more information
or you simply want to share your plans and connect with other solar enthusiasts, we encourage
you to join the
Yahoo
Group Simply Solar!
I'm not sure what I want to build yet. Where do I start?
If you haven't yet read through the Frequently Asked Questions, start there. The FAQ page provides a lot of information to help you think through the type of project that you would like to build. Once you have a better idea of what you want to build, then come back to this Construction 101 page for tips on the actual construction.
Is building and installing a
solar collector system difficult?
No! More precisely, it certainly doesn't have to be. While some collector designs can be challenging, there are very easily built design options that work great! You certainly don't have to be an accomplished "do-it yourselfer" to build and install very efficient solar collectors. The only power tools some designs require are an electric drill and possibly a jig saw! All the parts and materials you'll need are readily available at your local hardware store or ordered on line.
Do you have step by step plans for easy
to build, solar collectors?
Yes, this pictorial will take you though all the steps for building a very easy to construct, back pass, hot air collector:
This page details the construction of a basic hydronic (liquid) collector using copper tubing:
http://www.builditsolar.com/Projects/SpaceHeating/DHWplusSpace/CollectorConstruction.htm
And this page details the construction of a very easy to build hydronic (liquid) collector using pex tubing (no copper pipe to buy and no soldering required!):
http://www.builditsolar.com/Experimental/PEXCollector/Construction.htm
What is PEX, where do I find it
and how do I connect it?
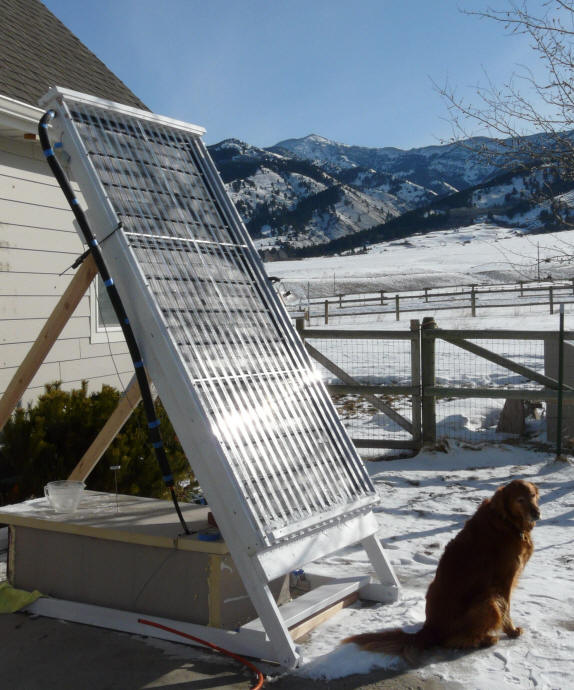
Pex is the tubing that is often used in under floor radiant heat systems, to transport fluid to your solar panels and to collect heat inside some solar panels like these:
Pex is generally available in sizes from 3/8" up to 2". Sizes most commonly used are 1/2" for runs up to 300 feet and 3/4" for longer runs. Pex will handle temperatures up to 200 degrees, is flexible, easy to work with and will last 50 years or more. Many brands, such as Mr. Pex from Pex Supply are also accepted for potable (drinking) water use.
Some types of pex include an oxygen barrier, which may increase the service life of cast iron pumps. If your goal is to keep all oxygen out of your system, you'll want that feature.
One type of pex, called Pex-Al-Pex, has a layer of aluminum that allows the pex to hold its shape when bent. Since it is less flexible, you may not want to pull Pex-Al-Pex through rafters in an under floor radiant heat project, but it is perfect for use running fluid to a collector and inside collectors (as long as care is taken to avoid high stagnation temperatures).
Pex is widely available. If it's not at your local Home Depot or Lowes, you can order it on line at very competitive prices from sites like this one: http://www.pexsupply.com.
Pex can be connected in a variety of ways including push on fittings like Sharkbite or Gatorbite, compression, press, crimp, clamping and expander fittings. Sharkbite fittings are available at Home Depot or from sites like http://www.pexsupply.com/SharkBite-Push-Fit-Fittings-588000.
Sharkbites are the easiest to use, literally just pushing on to Pex, copper and PVC. They make a permanent, leak free connection and don't require any tools. Nothing could be easier! On the other hand, since crimping connections are less expensive, if you have a lot of connections to make (and you aren't using Pex-Al-Pex), it may be worth purchasing a crimping tool. There are some great, "how to" videos that demonstrate each of your pex connection options here: http://www.pexsupply.com/resources/videos
Some flavors of Pex-Al-Pex may have slightly different dimensions. While folks are successfully using Sharkbites with 1/2" Pex-Al-Pex, you may want to consider using compression fittings like these: http://www.pexsupply.com/PEX-Compression-Fittings-364000
For more information:
http://en.wikipedia.org/wiki/Cross-linked_polyethylene
What do you recommend to use for a clear glazing?
Suntuf is light, very easy to work with (cut and drill), tolerates high heat, is strong to the elements, inexpensive (less than $20 for a 8 foot X 26 inch piece), UV protected and readily available at most Home Depots. Tuftex is carried at Lowes and is similar. If your local Home Depot doesn't have Suntuf in stock, ask them where the closest store is that has Suntuf 8' X 26" clear roofing panel. The SKU number they'll want is 282688. If their answer is too far to drive, ask them to order it for you. Most Home Depots are happy to.
You'll also need screws and wiggle strips. Those you can order on line yourself from the Home Depot web site if you like. Here are the links to everything you'll need:
The Glazing (clear, 8' X
26" panel):
http://www.homedepot.com/h_d1/N-5yc1vZ1xh7/R-100021329/h_d2/ProductDisplay?langId=-1&storeId=10051&catalogId=10053
And the Wiggle Strips:
http://www.homedepot.com/h_d1/N-5yc1vZ1xh7/R-100078282/h_d2/ProductDisplay?langId=-1&storeId=10051&catalogId=10053
Suntuf is a great option
for glazing, but it is by no means the only one. Here is a great list
with pros and cons of many glazing options:
http://www.builditsolar.com/Projects/SpaceHeating/Glazing.htm
How do I attach Suntuf to my frame?

Suntuf is light, easy to work with and makes an excellent, inexpensive glazing. It can be drilled with a regular bit (though the Suntuf documentation recommends a stainless steel bit designed for metal) and it can be easily cut with hand or power tools. Here are links for all the parts you will need to install SunTuf:
The Glazing (clear, 8' X
26" panel):
http://www.homedepot.com/h_d1/N-5yc1vZ1xh7/R-100021329/h_d2/ProductDisplay?langId=-1&storeId=10051&catalogId=10053
And the Wiggle Strips:
http://www.homedepot.com/h_d1/N-5yc1vZ1xh7/R-100078282/h_d2/ProductDisplay?langId=-1&storeId=10051&catalogId=10053
Here is how I went about attaching Suntuf to my frame:
1. I began by attaching the wiggle strips to the top and bottom of the frame, with just enough screws to hold them in place:
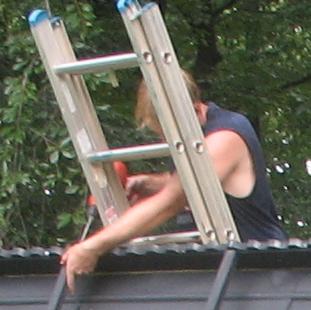
I'm
actually screwing in a support for the glazing here - 1 every 24 inches
2. Then I put the Suntuf on, a panel at a time:
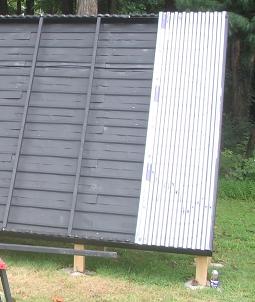
Use
a 1/4" bit to give the Suntuf room for thermal expansion when you pre drill
the screw holes.
These are the screws:

3. Each panel overlaps the next (they are 26"), so just keep adding panels:

Two
panels overlap at the center screw
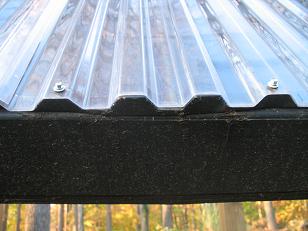
View
from bottom looking up
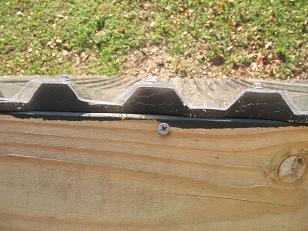
View
from top looking down
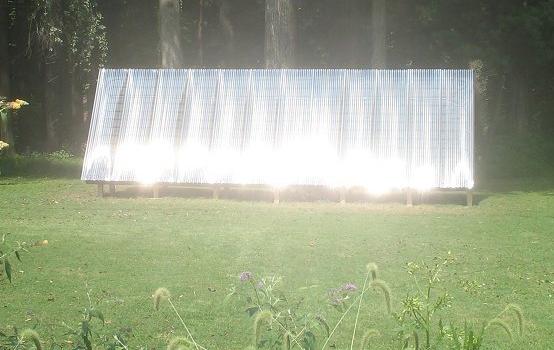
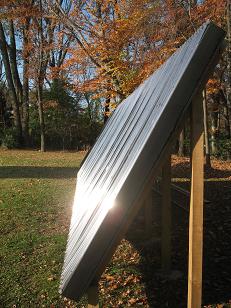
I am really impressed with the appearance of the finished product.
For more information, please
see the Suntuf manual:
http://www.palramamericas.com/docs/upload/F409_Suntuf_Install-5-22-09.pdf