| Our
24
Foot By 8 Foot PEX Solar Panel |
|||||||||
|
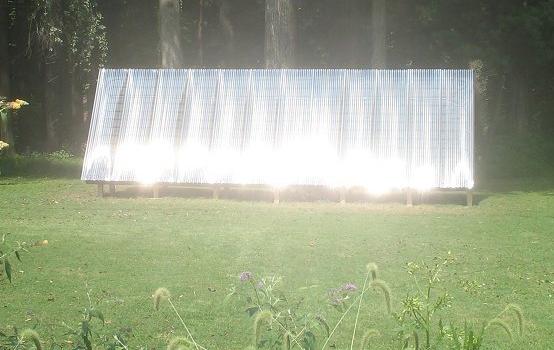
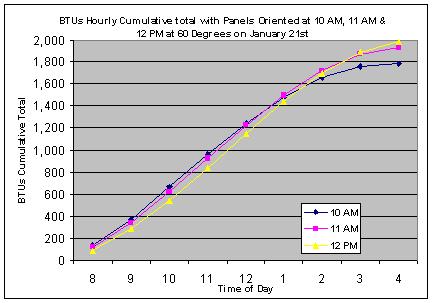
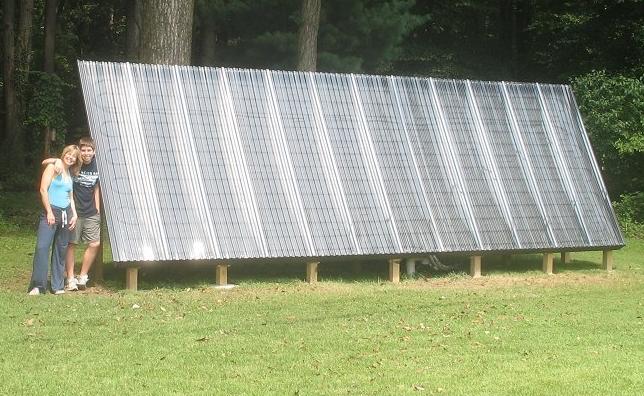
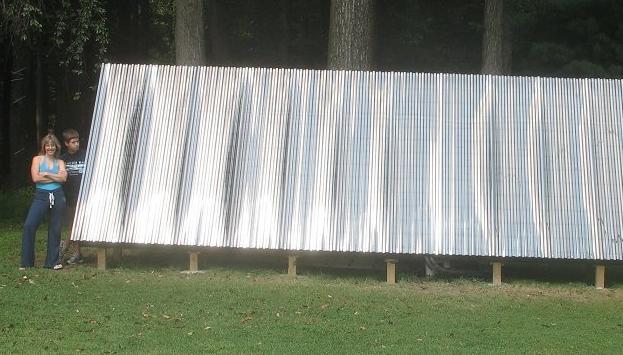
After lots of success with my solar water, air and electric projects, it was time to get serious and build big! The first step was to choose a site that had lots of sun, but was out of the way of our other activities and had the best overall appearance. I spent months just walking around the house, imagining different locations and designs in my mind. After lots of consideration, I opted to build a ground mounted panel in the back yard by the tree line (all construction details below). The advantages are that it is completely out of the way, neighborhood friendly and being ground mounted, very easy to construct. Really, the only disadvantage was the day it took to dig the 100 foot trench (by hand with shovel) out to the panel. So far, I'm really pleased with my placement decision and everything about this project, which turned out to be a huge amount of fun to build and an activity that the whole family enjoyed! In the summer, it's easy to supply your hot water needs with a very modest panel. My goal was to build a panel that would not only meet our year round hot water needs, I also wanted to heat a portion of our home by installing a simple, under floor radiant heat system that circulates the heated water. With that in mind, I decided to orient the panel so it would be most efficient during the coldest part of winter. It will be less efficient during the summer months, but there is so much more sun and our heat demand is so much less, that it will provide more than enough heat during the long summer days too. With January 21st as statistically the coldest day of the year, I choose to design my panel to perform the best then. What's encouraging is that there are a large range of direction and tilt angles that work well. Here are the results of my analysis: Direction: Here are the daily cumulative BTU totals on one square foot of panel oriented at 10:00 AM, 11:00 AM and 12:00 PM on January 21st:
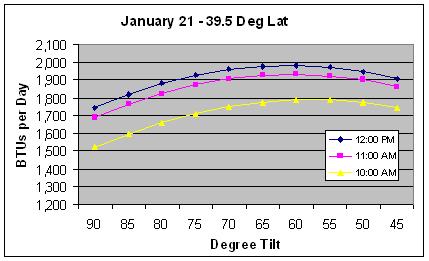
As you can see, there is very little difference in performance between the 12:00 PM and 11:00 AM orientations, and only about a 10% drop off at the 10:00 AM orientation. Since I get some shade late in the day, I decided to use the 11:00 AM orientation. Tilt: The next question was to decide how much tilt to give the collector:
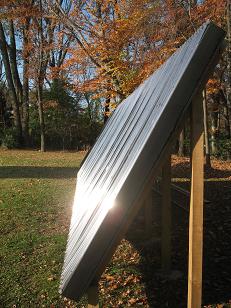
Like direction, there are a variety of tilt angles that work well, but I choose 60 degrees to optimize the sun angle on the coldest day of the year. I decided to use this pex collector design as it was extremely easy to build. There are lots of pictures and construction details here: http://www.builditsolar.com/Experimental/PEXCollector/PEXCollector.htm I'll let the pictures and video tell the rest of the story. Be sure to ready the bottom of this page for ideas and suggestions:
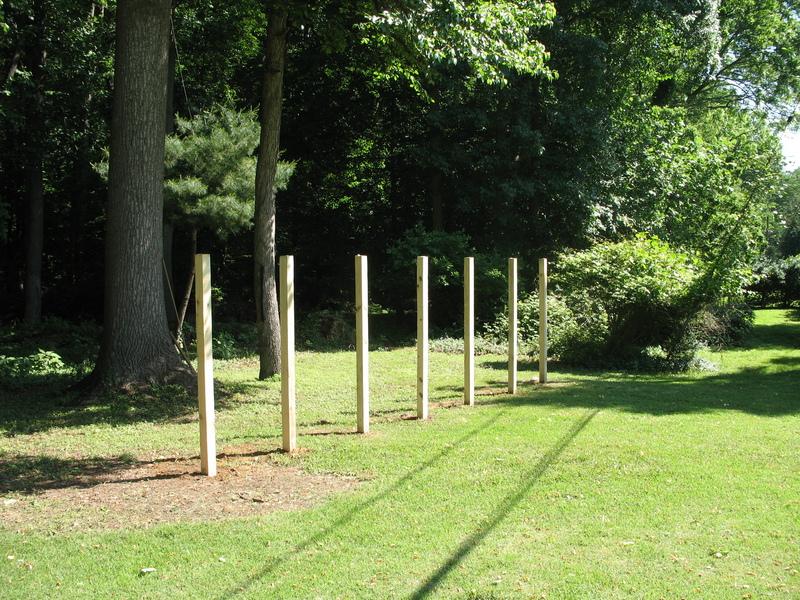
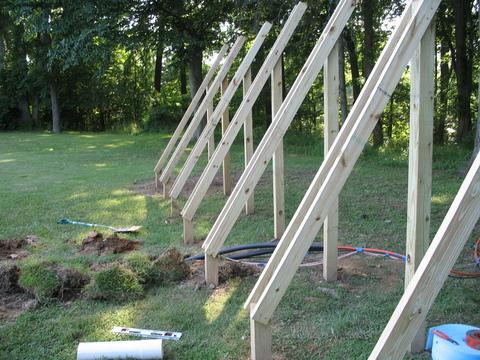
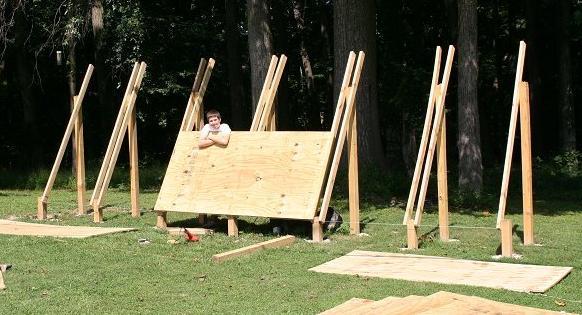
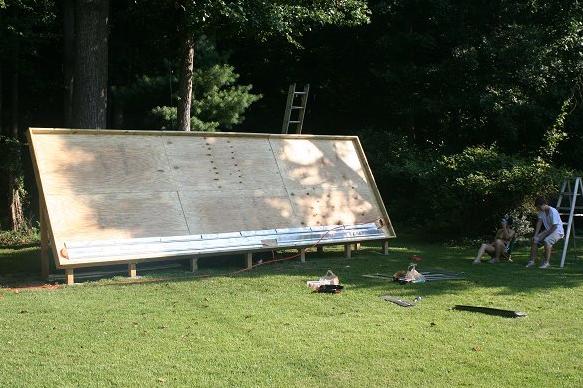
I began by setting the back posts for the panel. They are 8 foot, 4 X 4s set two feet into the ground.
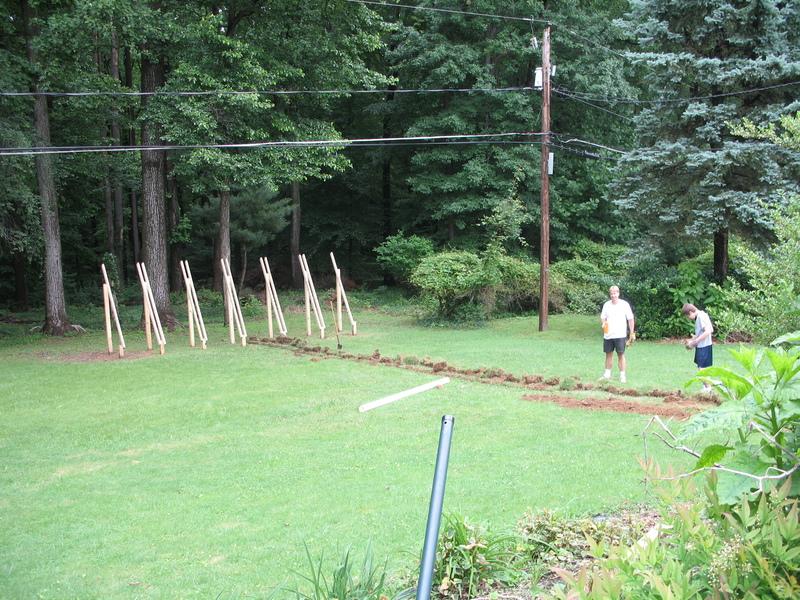
Then I added the front posts and connected them with 2 X 4's (by the way, all lumber is pressure treated) There is roughly 2' 10" between the front and back posts to get the 60 degree angle. Digging by hand with the post hole digger and hitting the occasional root / rock, the posts are not exact. It is easy to compensate though. When you connect the front and back posts with 2 X 4's , do the far left and right ones first, tie string between the two at the tops and bottoms and then position the rest of the 2 X 4s up or down on the posts as needed to make a nice, straight line. You may have to cut the top edges off some of the posts after you attach the 2 X 4s , but that is easy because the 2 X 4's act as a guide for your hand saw.
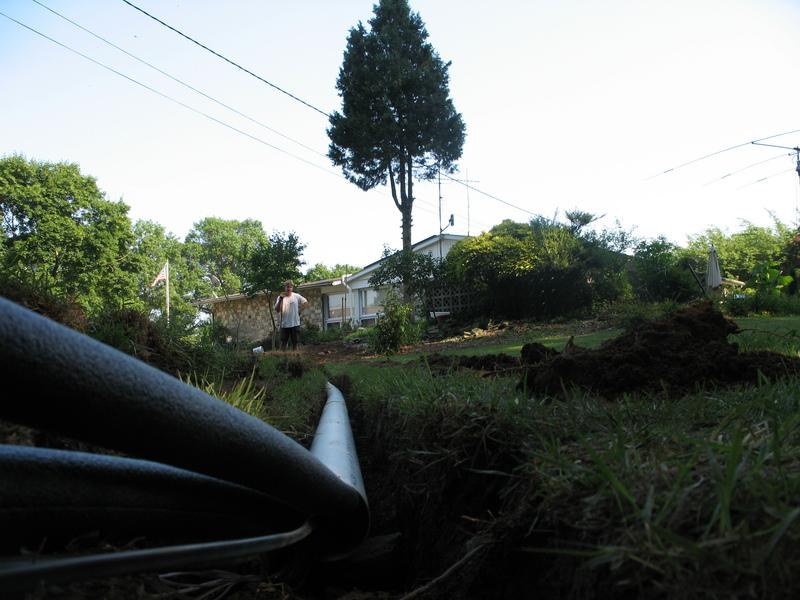
My 15 year
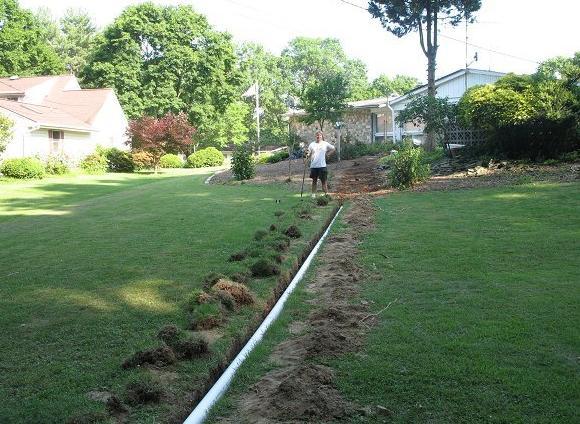
old son Brad and I dug the 100 foot trench out to the panel
by hand.
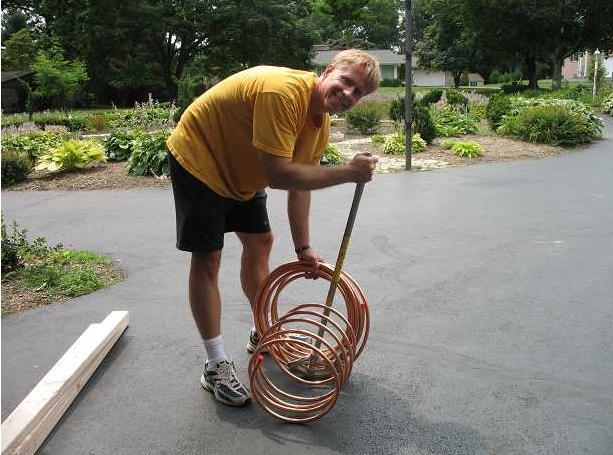
Then we
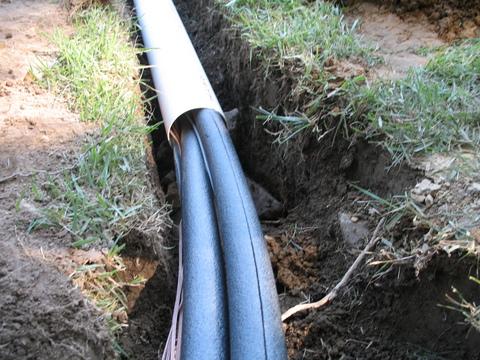
inserted the 1/2" PEX, electrical wire (not used in the project but
I wanted an outlet by the panel)
The PEX is nicely insulated.
I put a 90 degree angle (not shown) to bring the conduit out of the ground.
Though the slope is gentle, the panel is definitely below our house, so I wasn't able to do a drain back system.
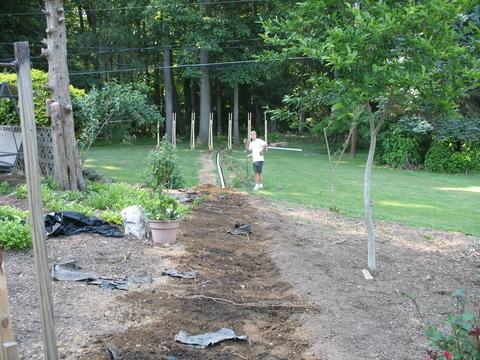
It only took an hour or so with the rake to fill the trench back in.
There are
lots of options. If you only want space heat and you don't
want to worry about heat storage, just By the
way, I did not solder one pipe during this project. All
connections were made with Shark Bite
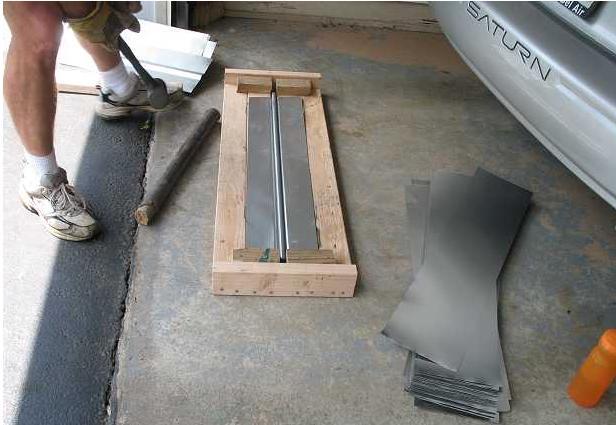
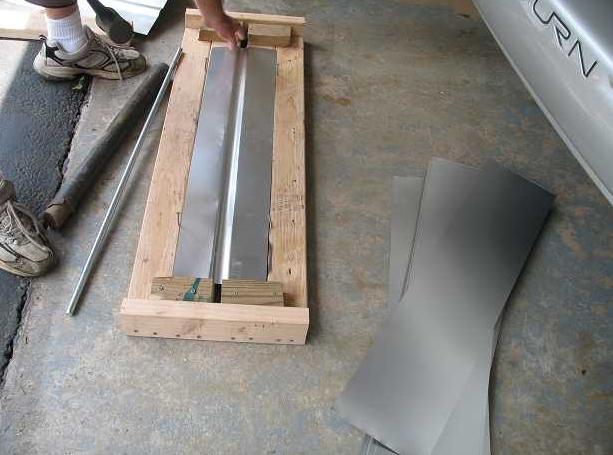
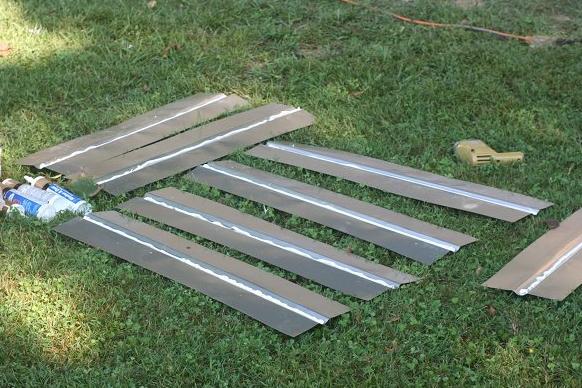
The next
step was making the heat absorber plates. I couldn't find
any 8 inch wide flashing locally
A completed plate.
With all
the parts, it's time to start building! The panel itself
only took two weekends to complete
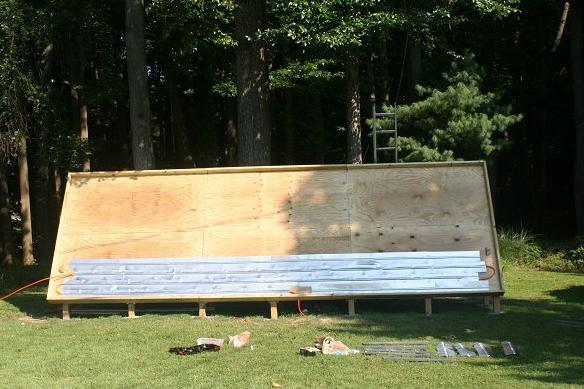
Bottom row complete.
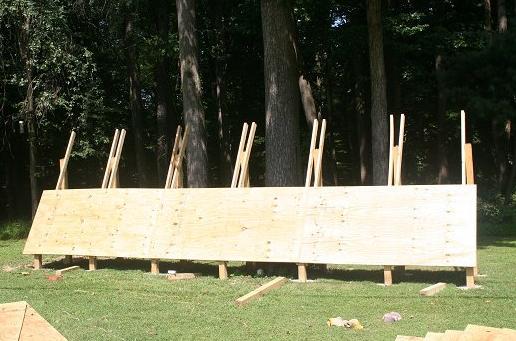
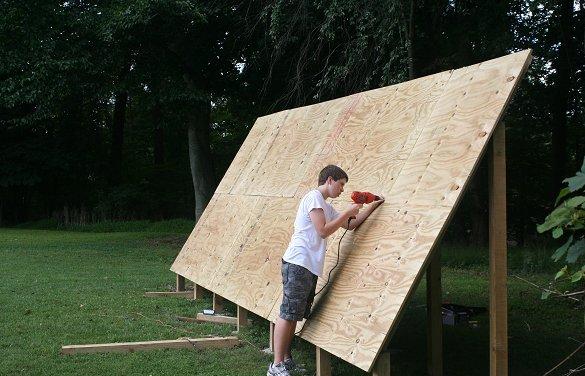
I cut one of the 4' X 8' pieces of plywood in half on the top section. That way,
Brad is a tremendous help!
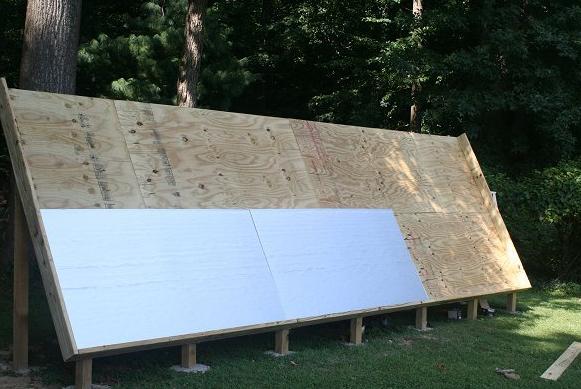
Then we added 6, 4' X 8' panels of 1" insulation. I used 2" X 6" lumber for the edges.
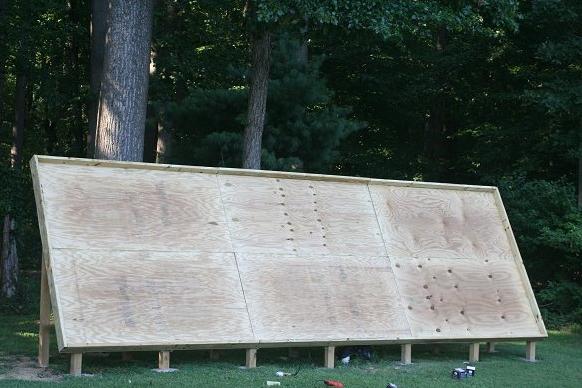
No, this
isn't out of order. We then put another layer of plywood
over the insulation to attach the PEX to
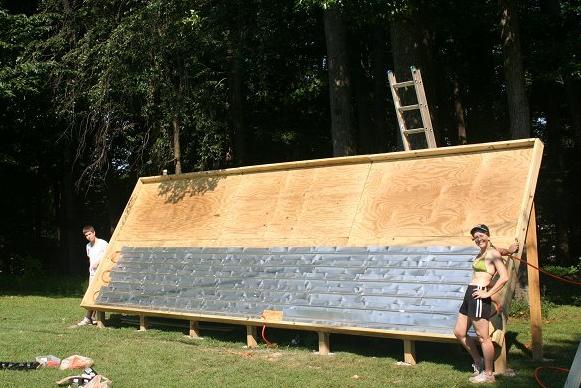
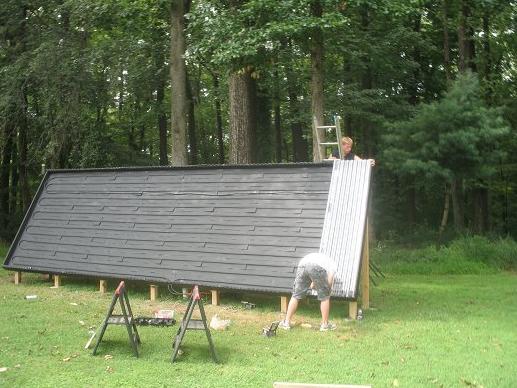
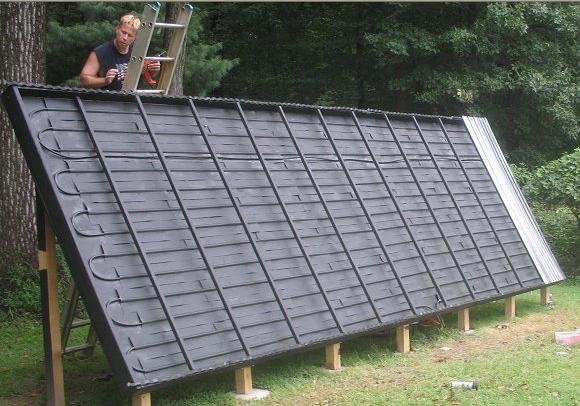
Sunday we started attaching the PEX and flashing. We ran caulk in the groves as it will fill in any air gaps.
Under way, but losing our morning shade fast!
Step by step....
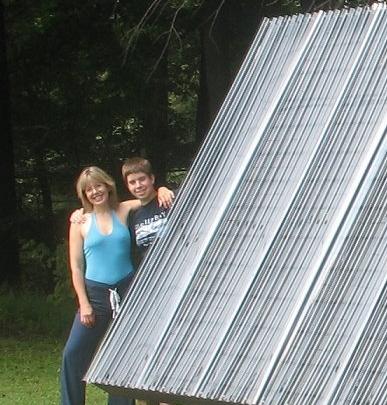
Not only was Kim (my wife) a great help this morning, she got to work on her tan too!
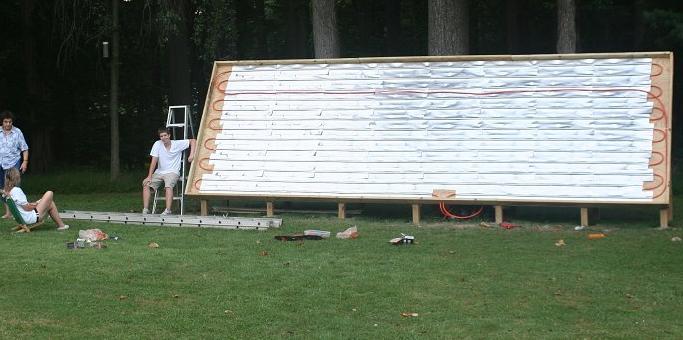
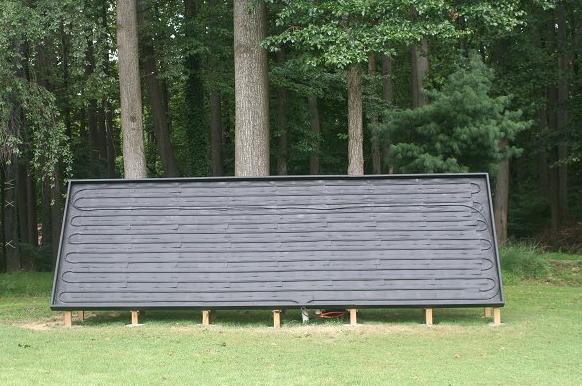
Flashing (heat absorber plates) finished!
Painting complete!
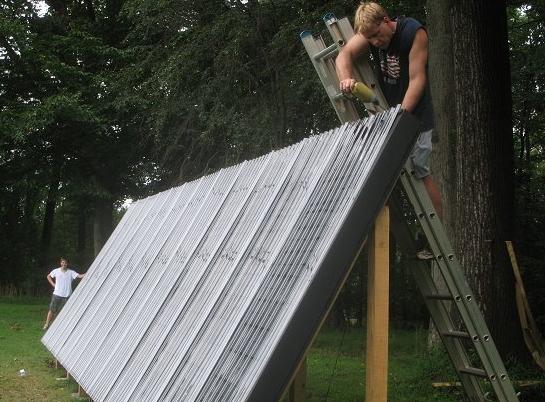
Getting measurements for the SunTuf glazing.
We spray painted the "wiggle strips" that the SunTuf sits on black. We also put
in 2 X 2s where the SunTuf overlaps for
I'm making some final adjustments to one of the 2 X 2s.
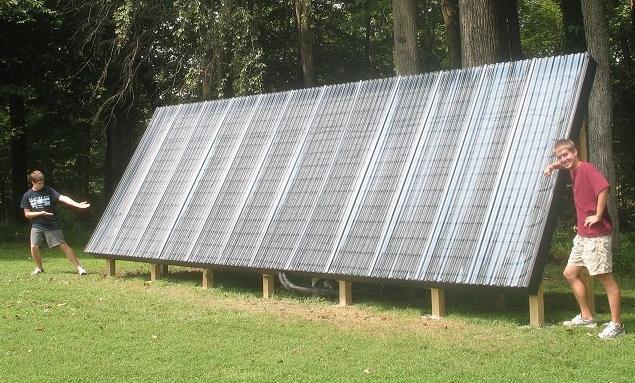
This panel is super easy to build in any configuration, but the 60 degree angle
made laying out
A less reflective angle
Kimberly (my wife) has been on board with my solar interest from the start!
I can't thank Kim and sons Brad and....
Chris for all their help!
Parts list (collector only) and a very rough cost estimate: I've been getting lots of e-mail asking about the cost of building the 24 foot by 8 foot collector. I started out keeping careful track of my costs, but since this came together over a period of months that discipline didn't hold. I'm going to try to grab some time and see what receipts I can find. In the mean time, here is the parts list for the collector and a very rough guesstimate for most of the costs:12 pieces Sun Tuf glazing ($240) (This number is accurate
as it was my most recent purchase)
6 polyiso insulation ($100) 6 5/8" plywood ($150) 6 3/8" plywood ($100) (I could have used OSB board for a total of $30 and saved $70) 8 2 X 6s ($35) 11 2 X 2s ($22) 8 50' rolls of 8" flashing (I had a lot left over as my pex was a little
more than 6" apart) ($100) About 300 feet of 1/2" Pex-Al-Pex ($150) Miscellaneous screws and caulk ($100) So, very, very roughly, the total cost for the collector itself was $997. All parts purchased from Home Depot except the 8" flashing from Amazon and Pex-Al-Pex from www.pexsupply.com. Summary: So far I'm really excited about my 24' X 8' pex collector, not only because it seems to be working great (the 200 gallon thermal storage tank is running 120 - 130 degrees and the sun is far from the optimum angle on the panel in August), but because it is truly something anyone can build in any configuration.It wasn't a bit intimidating to put together. Whatever dimensions you happen to have space for, long and thin, short and fat or just plain big, you can build the collector to suit your space. It took no special tools or ability, no plumbing skills (just slide on a couple SharkBite connectors), was very easy and extremely fun to build. There is no reason that this concept can't be incorporated into everyone's home or backyard! Another thing I like is the flexibility of use of the panel. I've got a thermal storage tank so I can use the heat for both domestic hot water year round as well as winter space heating, but if you don't want to build a thermal storage tank, that's fine too. Just install an under floor radiant heat system (it's quick, inexpensive and easy), hook it directly to the panel and let it heat your room(s) while the sun is shining. By the way, it only took a few hours to install an under floor radiant heat "system" under our family room. It is nothing more than using the same aluminum fins I bent from flashing for the collector, attaching them over pex as I did for the collector (see the pictures) and stuffing BAT insulation up against it. Whether you are an experienced "do-it-yourselfer" or not (I'm not), anyone can do it! How it's working and what I would do different: The system is working well. During
the months that we aren't drawing out heat for winter space
heating, the 200
gallon thermal
storage tank
typically gets to between 120 - 130F each sunny day. We are a family of 4 (2 sons) who
take lots of showers, wash clothes, dishes, etc. In addition, temperatures don't need to be as high for winter
space
heating and the collector appears to be much more efficient at those
temperatures (more detail and follow up in the
overall assessment below).
Since the collector came on line in August, regardless of the temperature exiting the thermal storage tank that feeds the collector, I very rarely see fluid temperatures much over 140F returning. I'm guessing the efficiency drops quite a bit above 140F. For a pex collector, that's not necessarily a bad thing as I'm well within the design limits of the PEX. I think my temperature measurements may be a little low. I have the thermometer sensors taped to the PEX with electrical tape. They are then covered by pipe insulation. I think that the cooler ambient air is having some affect and not allowing the sensor to read the full value. On a couple of occasions I've read a higher tank temperature (a sensor is actually inside the tank and getting an accurate reading) than the temperature reading of the fluid in the pipe, which of course is impossible. For more details on how I attached the sensors, please see Solar Construction 101. With those prefaces, here is my overall assessment: My pex collector is working well, but not as well as Gary's
prototype. Generally, up through November, I was seeing about a 30
degree rise at a gallon per minute from the collector and it warmed my 200
gallon thermal storage tank from about 85F to 120F in 4 hours. That's a lot of
free heat, which is exciting! Still, for a 24' X 8' collector, I should be able
to capture even more heat.
Gary got better performance with his pex collector. The main differences between my collector and Gary's are that I used thinner aluminum, I did not put the aluminum strips under the pex and my flow rate is much lower. Based on the comparative results I think a pex collector with heavier aluminum, aluminum strips underneath and better flow will perform better. Without testing, it's impossible to say which of these variables will have the most effect. I'm considering retrofitting the collector this spring, which will be very easy to do. I may add heavier aluminum and possibly strips underneath. I may also add a second run of pex in between the current run. That will enable me to feed the collector in parallel, which will enhance flow. In fact, adding the second run will be so easy to do that I may begin there. I'm completely satisfied with my frame (which can be easily retrofitted to any internal heat gathering design I like), its sturdiness, placement in the yard, overall appearance, etc. We have experienced some very high winds over the winter and it doesn't budge at all. One great thing, now that I have the collector frame built, it will look the same no matter what I put inside it and it is super easy to retrofit any way I like. Perfect for experimentation! Whatever solar panel design you want to implement, I strongly recommend the frame design. It was very easy to build, inexpensive and should last a long time. Once we hit December, as is typical of the month, the cloudy days have been the biggest enemy. I did happen to be home on December 21st, the solar minimum, and there was enough sun to bring my 200 gallons up to 100 degrees with the radiant heat running and normal family hot water usage. With increasing daylight and January being a statistically sunnier month, performance should improve steadily from here. I continue to believe that my panel isn't fully awake and that I can get more out of that existing space. By using runs of 3/4" pipe out to the collector for better flow, using heavier aluminum, placing the aluminum under the pex and / or adding another run of pex inside the collector, I'm confident I can get more out of it. Gary got very good performance out of his pex collector and I'm certain that with some tweaking I can duplicate his results. The 100 foot trench has been working well as I only seem to be losing 2F - 3F degrees from the collector to the house. I should have used 3/4" pex though to improve flow. So, in summary, I'm very excited about my results so far and I can't wait to experiment more!
SimplySolar - Solar Forum and E-mail Groups! It
turns out that there are other folks like me who also enjoy
sharing ideas and learning from each other's experiments! If you have an interest in brainstorming
solar projects that are easy and inexpensive to build and
neighborhood friendly, or want some help with a project that you have
underway, please join us!
I originally set up an e-mail group - SimplySolar, for that purpose. The e-mail group has served us well, but with overwhelming growth and interest in the e-mail group, to better keep content organized and give members the option to easily follow only the threads that interest them, we have just set up a new Simply Solar on line forum! SimplySolar is about brainstorming and sharing ways to implement solar heat in easy ways that the average homeowner, who may not be much of a "do-it-yourselfer" (like me), can use to put money back in their pockets, green back in the environment and have a lot of fun along the way! If solar excites you, we would love to have you join our forum: Click to visit or join the Simply Solar Forum or subscribe to our e-mail group! Again, please let me know if you have any questions.
|